I’m working on replacing my porch furniture, and the side table was the worst of the lot so it got replaced first.
I’ve built a few little tables by now and I’ve got a lot of the process down. I used this one as an excuse to practice making actual mortise and tenon joints instead of the loose tenons I’ve used in the past. The mortises that the center brace sits in were chiseled by hand, the others are routed.
I’m thinking of making a couple outdoor-friendly morris chairs to replace those old iron ones. That’ll be a minute though.
Looks great! I’m thinking about trying a mortise and tenon project. Any progress photos?

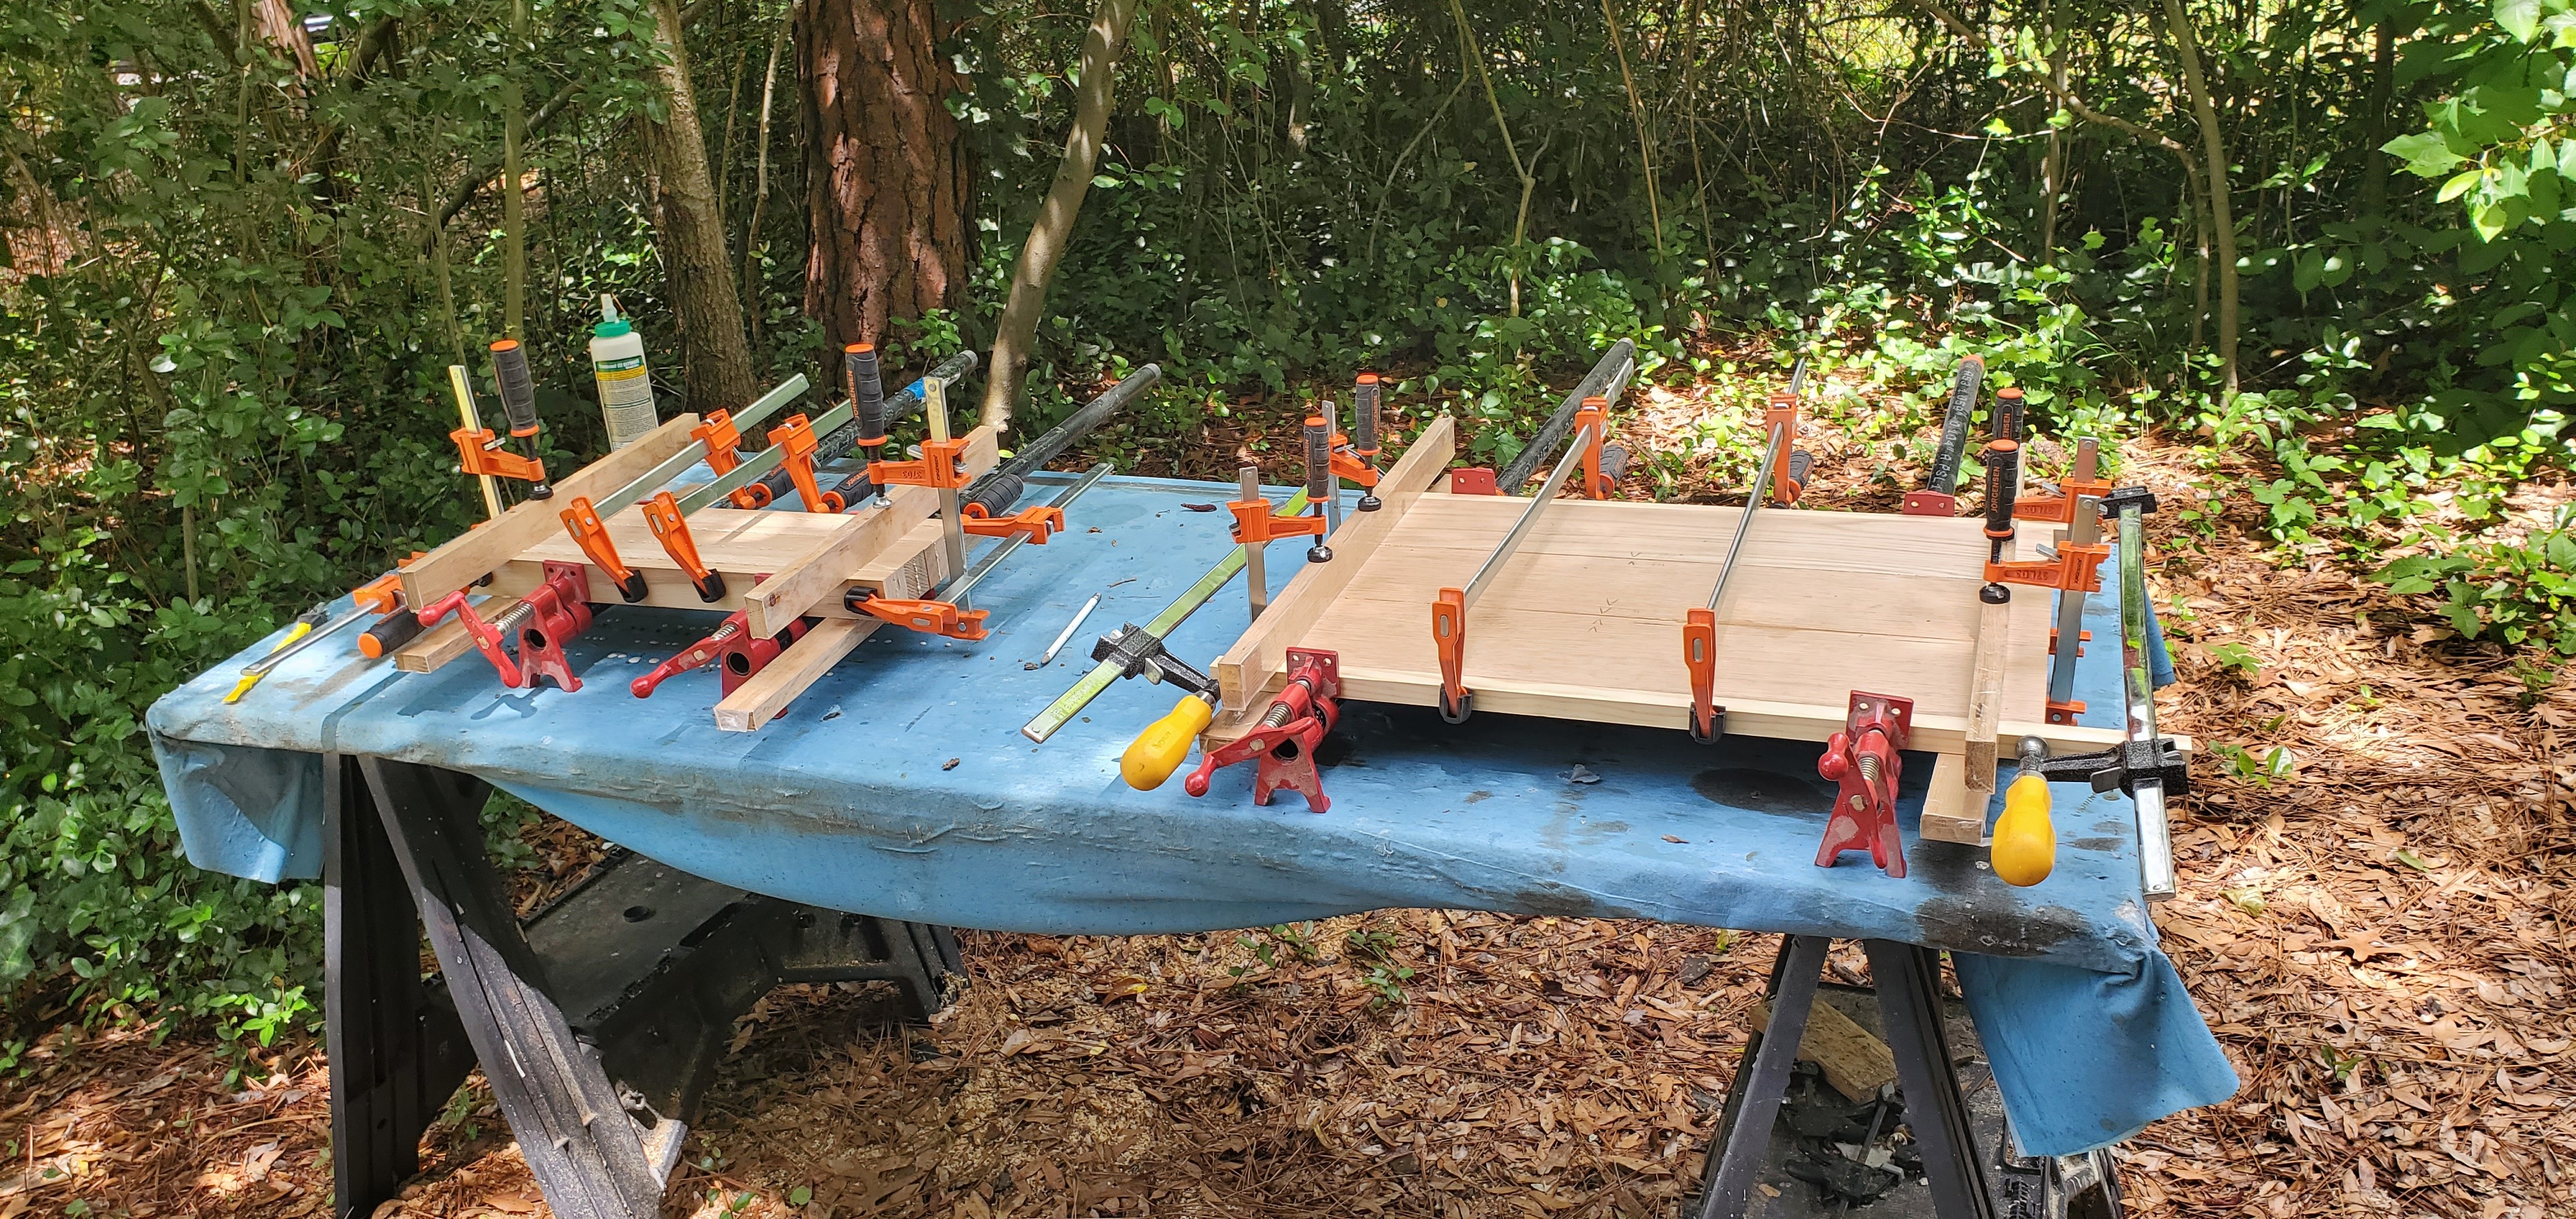
The only photo in progress I have is this the top and the legs glued up in the clamps. I should have taken some shots of it at various stages.
I will share here my journey with mortise and tenons, for this project is a rematch. The two end tables I posted about a year ago were designed with mortise and tenons, and I tried to cut them on my table saw with a dado stack. I’ve seen others do it that way but I struggle to control the depth of cut precise enough to make tenons. So I cut the tenons off, routed mortises in the end grain of the boards and used floating tenons. Saved the project.
On the kitty approved porch table I built this spring, I designed the aprons with floating tenons to begin with since I had a method for doing that I was comfortable with. That table got breadboard ends, because I didn’t want the captive panel’s movement to rack the legs. I did one of the tongues on the table saw keeping the tongue intentionally too thick and then rasping/planing/filing/sanding/chiseling/chewing/eroding it to proper thickness. Then I tried using a router, and it worked like a charm.
The plant stand I built uses end-of-board-in-mortise joints (The legs splay outward in 5 degrees to form a narrow pyramid, and the legs are very subtly tapered. FahahUCK trying to lay out the shoulder cuts for those tenons) which necessitated squaring the corners of the routed mortises with a chisel. So I got some practice with my bench chisels. I’ll admit posting that project here was a little bit of validation seeking; I took fairly flattering photos of it. Because there aren’t tenon shoulders on the aprons and rails you can see every apprentice mark on the mortises, and the patch on the leg where I plugged the mortise that I cut in the wrong damn face of the leg…the curse of the craftsman fell thick and fast on that one, I made it, I see every single flaw, and I don’t think I could see it as a piece of nice furniture if it wasn’t for this community’s kind words.
And having seen a couple videos on Wood By Wright’s channel about cutting mortises and tenons by hand, I gave that a try in some scrap, and it worked like a hot damn first try. So I felt bold enough to build this little table. And while it isn’t flawless I’m genuinely proud of this one. When I set the top on it I had one of those “look how far I’ve come” moments. Those first end tables took me nearly a month to build, basically all of November. This project went from rough sawn lumber to dry varnish in 4 days.
You want to tackle a mortise and tenon project? Great, go build it and come back here and show us. I’m looking forward to seeing what you build.
That’s really nice. Was going to ask if you used dowels or biscuits, then I actually read the post. Well done. Would love to do something like this in curly maple/cherry.
Both of those would be a great choice for a project like this, both are nice to work and they’ll finish up nicely. Go for it!
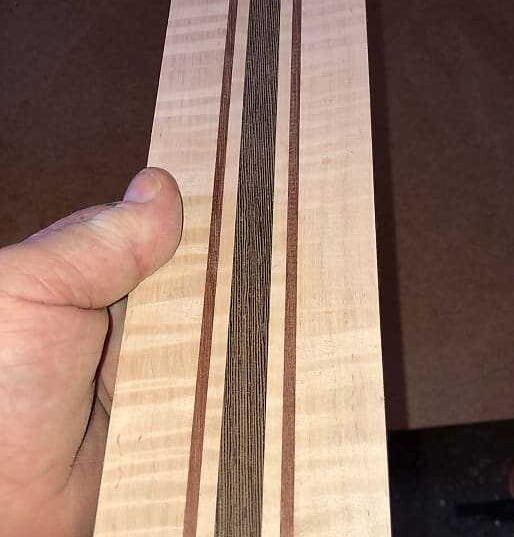
Coaster is nice too :)
That set of coasters was my first ever panel glue-up. I had made a few things, had some random narrow scraps, so I glued them together and made coasters, mostly to practice making panels. I learned a lot, and I use those coasters every day.
Why is it called a shaker table?
Minimalist well made furniture: https://en.m.wikipedia.org/wiki/Shaker_furniture
The United Society of Believers in Christ’s Second Appearing were one of those sects of mutant Christianity that happen all the time in the United States, they were nicknamed “Shakers” because let’s be real nobody’s going to actually call them The Organization Of The United Brotherhood Of Jesus’ Best Friends Forever And Ever Society…and because their worship services involved jumping up and dancing. To quote a Crash Test Dummies song, “And when they went to their church, they shook and lurched all over the church floor.” This is also how the Quakers got their name. Yes, as in the oat mascot.
They believed in separating themselves from society, they took some passage in the bible that says something like “of man and woman was He” to mean God was both gendered and thus they had both men and women in positions of leadership in the church, though they did pretty strictly conform to gender norms in the workplace; women worked indoors cooking, doing laundry, practicing crafts etc, men worked the fields and workshops. They were so celibate that men and women weren’t even allowed to use the same staircase, which is largely why this comment is written in the past tense.
They’re a bit like the Amish in that they associated simplicity with piety, though they weren’t deliberately retro, there were many notable Shaker inventors, along with artists and musicians. The song “Simple Gifts” was composed by a shaker. They also strongly agreed with the statement “Idle hands are the devil’s playthings” and so they were all about hard work and craftsmanship. Which is why today they are strongly associated with a style of simple yet well made furniture.
Shaker furniture tends to have few if any features intended for decoration, instead deriving beauty from well-chosen proportions and symmetry. They eschewed metal handles and so when a piece has doors or drawers it will have simple turned wooden knobs. Occasionally they would allow such things as tapered legs or chamfered edges, as I have added to this piece, but they would make mission-style furniture seem downright ornate. They did have a tendency to stain or paint their pieces in solid colors, often red or orange but sometimes green. Shaker furniture tends to be the platonic ideal of whatever it is; it’s difficult to describe a shaker chair as anything more than "a very well made, simple wooden chair.’
Related to shaker furniture, they always installed a wooden rail along the walls of their buildings with evenly spaced pegs, which could be used to hang such items as clocks, small cabinets, clothing, or even lighter items of furniture such as chairs when not in use.
A+ reply in every way, bravo!
Looks good! What finish did you use for keeping it outside? I’ve been thinking about doing something similar, but never made anything intended to be kept outside.
Coaster is cool too. It reminds me of a fancy laminated guitar neck.

Thanks! The finish I’ve used on all of my outdoor projects so far is Minwax Helmsman spar urethane. I thin it to about 60/40 with paint thinner and wipe it on with rags cut from old T-shirts, 4 coats ~8 hours apart, rubbing out between coats with a paper grocery bag. Takes on a very nice feel and water beads right off. We’ll see how it holds up long-term but so far I like it.
Yeah that guitar neck looks a lot like how I make those scrap coasters. You end up with thin cutoffs from ripping rough stock to width, so joint them, glue them up into a narrow little panel, plane it to a uniform thickness of about 3/8" or so, cross-cut it into squares, put a roundover or a chamfer on them to dress them up, sand and apply your preferred finish. I’ve used Minwax’s “I Can’t Believe It’s Not” Tung Oil Finish (basically it’s danish oil) on the one in the photo, just today I made a set specifically for outdoor use that I put spar urethane on.


